If you are new to Spring Framework, get ready for the first taste of it with this spring tutorial. A Spring for Beginners if you will.
Title
Spring Tutorials– Tutorial 1– Hello World
Time to read
16 minutes approx.(your mileage may vary)
What is it about?
I introduce spring framework at the most basic level. I provide a hello world example without spring and then introduce spring into it.
Spring Skill Level
Beginner
Topics involved
Spring Beans, Spring Boot, Sprint Initializr, Spring Core, Spring Context, Spring Config, Spring dependency injection
Requirements
Java 7 or higher. I used JDK1.8 for this tutorial
Welcome to Spring Tutorials!
Spring Tutorial #1 – Hello World
In this post, We will learn the answers to the following questions:
1) What do I need to know before learning Spring Framework?
I will go over any pre-requisite(s) you need to get started (there is a surprise here). I will pick the latest Spring version 4.3.10 for this tutorial. If you are still on spring 3 version, please let me know.
2) What is at the heart of Spring Framework?
I will touch upon Spring Core (the basics) by showcasing the issues Spring addressed. Spring Core is the underlying spring architecture. You will be able to answer the most important question of all – What is Spring Framework?
3) Where do I download it?
I will show more than one way to download it – (maven, spring initializr, plain vanilla download). I will also show more than one way of Spring Configuration.
4) Can you give me a simple example of “Spring Framework”?
I will provide a Hello World example (the least amount of working code) with and without Spring. I will start with an example and then introduce spring into it.
A simple question for you before I begin:
Can you count from 1 to 20?
Here, Let me help you. Go ahead and read it out loud.
Did she see any pattern now? Of course, she did. ‘Twenty‘ seemed to show up everywhere.
Counting from thirty to forty was not any different now. She was over the learning curve and needed few corrections here and there.
She spent almost a full year learning to count from 1 to 20.
But she spent only a few months going from 20 to 100.
Let me clarify this. Counting from 1 to 20 is the hardest thing you can do.
There is no pattern here.
You have to learn it the hard way. Get over this curve and life becomes easier.
Take that as a big lesson in life. Start anything and you have to go through the grind. Once you are past the initial struggle, things get easier.
Can you predict what I am going to say next:
Learning Spring Framework (or anything new) is no different from learning to count.
It is challenging at first but becomes easier as you progress. You will make mistakes. We all do. Have some patience.
As a kid, It took me a while to learn the colors of the rainbow in its correct order. And then my best friend gave me a pattern – ROYGBIV or VIBGYOR. I still remember it decades later.
As a Spring Developer, you want to learn why things work the way they work. The syntax, the annotations, the examples will become easier to understand that way. A pattern will emerge sooner or later from the initial randomness.
It is worth the effort to go through this randomness. A good foundation is the core of any learning. Find your own randomness.
If you have been following the blog, Here is what we have captured so far:
1) Why would you want to learn Spring Framework?
Before picking up a topic, it makes sense to understand its importance. In that post, I go over why Spring Framework exists. Why was it important to Java Community.
2) What are different ways you can use Spring Framework?
With that post, I provided twelve reasons to use Spring Framework in your projects. I provided examples of where I had used them in my projects. For Spring projects I haven’t yet worked with, I identified scenarios for where I would use them.
3) Where can you fit Spring Projects in your application?
I went over Spring Projects and Modules and provided a quick overview of where you can bring them in your projects. There is a difference between Spring Core and Spring Data. One is a module and the other one is a project. Read more here.
4) What is the history of Spring Framework?
In the post, I provide a history of how Spring Framework became what it is today with timelines and key goals it met.
Let’s begin our tutorial…
What do I need to know beforehand?
To learn Spring Framework, there is one key pre-requisite. You must know what this line of code below is doing.
DummyService dummyService = new DummyServiceImpl();
After all, that is how Rod Johnson (Spring Founder) would have started.
I have assumed you are writing a Java Application. If you are not, please leave me a message below. Once you understand what Spring can do, you can use Spring in non-java applications.
I recently leveraged Spring Security to secure an Angular application (100% javascript/HTML). There was no Java code when I inherited it. I did add minimal Java code to configure Spring but the angular code remained untouched. This is a topic for future post.
When you are more familiar, Spring could serve as a back-end service application. You could pick your front-end application in the language of your choice. The front-end would interact with Spring via REST or Web Services or via Messaging. This is also a topic for future post.
Hello World – The Non-Spring Way
I will explain what was going through Rod’s head when he saw the line of code I shared above.
DummyService dummyService = new DummyServiceImpl();
I will turn the code above into a hello world example to explain what I mean.
Here is what the DummyService would have looked like
package com.springtutorials.tutorial1.services;

/**
 * @author amit@springtutorials.com
 *
 * A dummy service that returns "OK"
 */
public interface DummyService {

    String test();

}
There is no spring code in the above snippet. It is a simple java interface with a test() method.
The DummyServiceImpl would resemble something as follows.
package com.springtutorials.tutorial1.services;

/**
 * @author amit@springtutorials.com
 *
 * A dummy service implementation that returns "OK"
 */
public class DummyServiceImpl implements DummyService {

    @Override
    public String test() {
        return "OK";
    }
}
The DummyServiceImpl is again a plain vanilla implementation of service that returns “OK”. There is no spring code in it.
A HelloWorld Java application would call the DummyService above as follows:
package com.springtutorials.tutorial1;

import com.springtutorials.tutorial1.services.DummyService;
import com.springtutorials.tutorial1.services.DummyServiceImpl;

/**
 * @author amit@springtutorials.com
 */
public class HelloWorld {

    public static void main(String[] args){
        DummyService dummyService = new DummyServiceImpl();
        System.out.println(" DummyService returned: "+dummyService.test());
    }

}
Run HelloWorld.java and you should see the following output on the console:
DummyService returned: OK
The Problem
The code above looks benign and simple enough to warrant a key question:
What is wrong with it?
Why would Rod want to change the code and introduce Spring into it?
The problem lies in the following line of code in HelloWorld.java:
Our service (DummyServiceImpl) and our application (HelloWorld) must stay together from now on. They are tightly coupled to each other.
Any application wanting to use DummyService would have to include the DummyServiceImplalways. The Implementation must exist at compile time in any application that wants it.
This has few issues.
I will explain the issue and how we were dealing with it back in those days before Spring.
Issue 1: What if the service is remote? How will you compile it for deployment?
Workaround back then: You could create a stub that would act as a proxy for that implementation. That is how EJB and RMI worked in those days.
Here is a future problem: Anytime the service changed, the stub would be re-issued.
Issue 2: How do you test the remote service above in your local environment?
Workaround: Swap your remote stub with local implementation and do the testing. Re-swap it back to Remote Stub before code goes to PROD.
This could be problematic if remote service changed but your local logic stayed as-is. Especially in PROD.
Issue 3: What if services needed switching at run time? You are using Service A based on a condition and needed to switch to Service B based on criteria. How were developers handling this before Spring?
Workaround back then: You could take the application down for that switch. Re-compile again with the new service. Or you could check for instanceof to swap them wherever applicable.
Issue 4: The Service A and Service B may not coexist and may need swapping based on the environment. A good example is developers using in-memory DB in local. The production application could be using MySQL or Oracle or others. The same could apply for transaction strategies that differ between environments.
Workaround back then: see ‘instanceof‘ in Issue 3.
Issue 5: This issue may not be as obvious. The security of applications especially for banks needed addressing as well. Rod worked in that industry. Aspect Oriented Programming was fresh paint back then – up and coming. With AOP, the security hooks will weave into the application. This would help apply security at run-time without any code changes (via dynamic proxy)
Workaround back then: None. AOP introduced this concept and it did not exist before. Spring AOP may have been the first one to embrace this concept. I am not 100% sure on this one. Adrian Coyler worked for IBM back then and may have used some of it elsewhere.
Spring AOP Tutorial is coming soon.
Hello World – The Spring Way
Let’s dive into how Spring solved these issues. I will change the code of the above classes to show where Spring fits in.
I promise you have not seen this explanation anywhere before.
Step 1: The first step is – bringing Spring Libraries and its dependencies into the project. I will show you how to do this in more than one way.
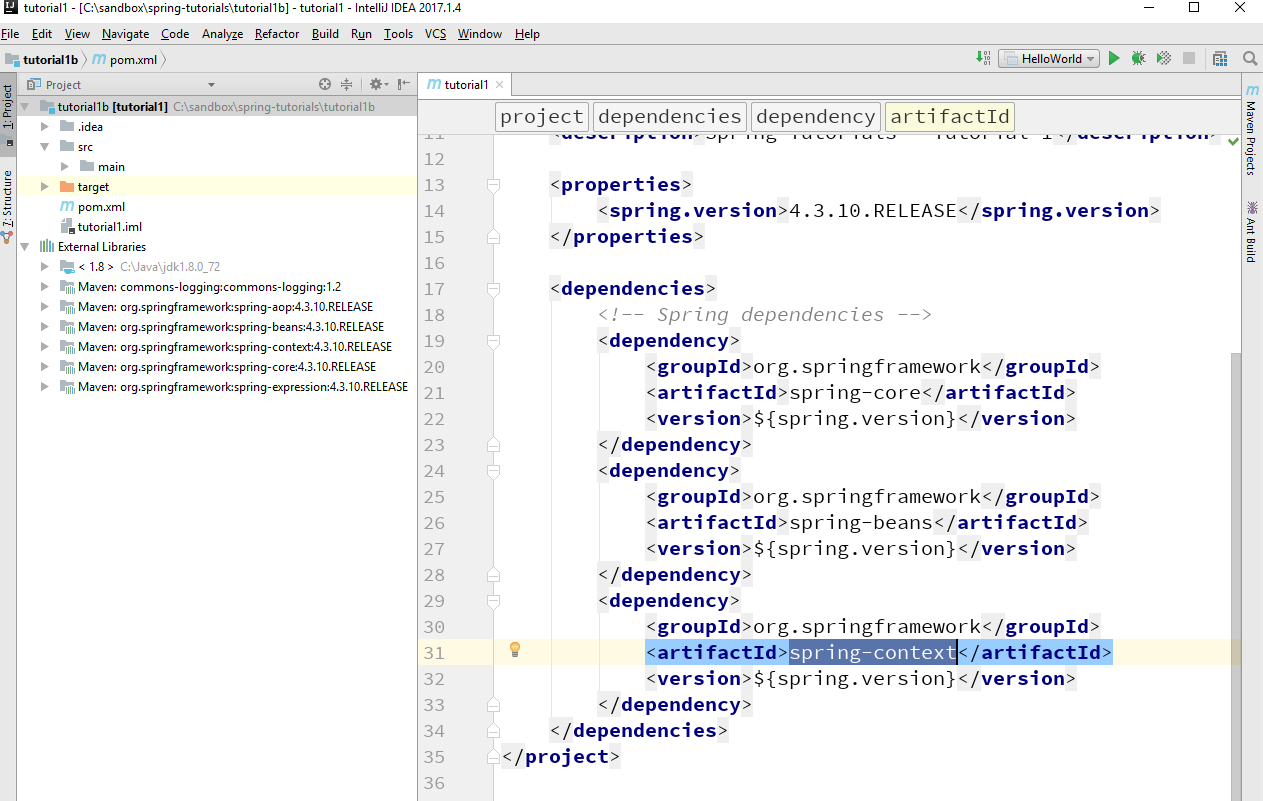
a) Bring Individual libraries using Maven
You can use this approach if you know which libraries you are bringing.
You also have to know the dependencies these libraries would need.
You are responsible for keeping track of the different versions of Spring libraries.
The pom is simple and yet powerful. The three Spring libraries pack enough power to run a standalone application. These three libraries form the basis for almost all Spring Projects.
I provided a matrix of Spring Projects and the Modules they depend on, in my previous post. Check it out here.
b) Use Spring Initializer and export a project template
With Spring Ecosystem growing, the libraries grew with them. This made it harder for developers to pick appropriate dependencies on their own. Spring Team realized that.
The Initializer lets you pick libraries based on the functionality you are seeking.
You have the option to pick from different Java versions (1.6, 1.7 and 1.8). Note: 1.9 is coming very soon.
You can decide if you want to use maven or gradle for your Project.
You can pick a language from Java, Groovy or Kotlin for your Project.
It will then generate a project template as a zip file.
Spring Initializr bundles everything under one umbrella project called Spring Boot.
Think of Spring Boot as a starter project that has everything you need to get going. It makes few decisions for you so you can be up and running in no time.
That is all I am going to say about Spring Boot today. This is a post of its own. I don’t want to confuse you.
To generate the zip file for our Hello World Example today, do the following:
Generate a ‘Maven Project‘ with ‘Java‘ and Spring Boot ‘1.5.6‘ as shown in the snapshot below.
3) In Project Metadata section,
Change Group to: ‘com.springtutorials‘
Change Artifact to: ‘tutorial1‘
4) Do not enter any Dependencies
5) click on ‘Generate Project’ and download the zip file. call it tutorial1.zip, if not already.
Spring Initializr – Hello World Spring Boot Example
This zip file has done some work for your already.
1) It has the basic project and folder structure.
2) It has a pom.xml with spring included in it.
3) It has a sample test in the test folder to get you started
4) It has the main java file with spring code ready to run.
c) Download the jar files
If you are not using Maven for any reason, please let me know in the comments below. I can do a post on Maven if needed. Download the following jars on your machine.
I use mvnrepository.com if I am searching for a jar file. Here are the direct links to the jar files.
I will be uploading these tutorials on GitHub. If you do not know how GitHub works, please let me know in the comments below. I split all the different ways I am trying into their own projects. Check out the following repositories:
Spring at its Core – The Heart of Spring Framework
With Spring dependencies added, There are two changes we need to make to our original code.
1) DummyServiceImpl will become a Spring Service now. Look for @Service annotation below.
package com.springtutorials.tutorial1.services;

import org.springframework.stereotype.Service;

/**
 * @author amit@springtutorials.com
 *
 * A dummy Spring service implementation that returns "OK"
 */
@Service
public class DummyServiceImpl implements DummyService {

    @Override
    public String test() {
        return "OK";
    }
}
Spring calls any class that has Spring injected into it – a Spring Bean. It is the only simple way to explain what a bean is. I will go into details of this later but should suffice for now (please bear with me).
We did not give DummyServiceImpl any name. By Default, Spring will give it a name. In this case, it is ‘dummyServiceImpl‘.
Here is how you can give Spring Service a name of its own:
Instead of @Service, Change it to @Service(“dummyService“).
2) HelloWorld.Java will call DummyServiceImpl via Spring now.
Once again, there are many ways to call Spring Service. I will show you four ways to use Spring to call your service.
2a) Call Spring Service Using Bean’s name (“dummyServiceImpl”)
Get Spring Context from Spring and ask for the bean by its name.
package com.springtutorials.tutorial1;

import com.springtutorials.tutorial1.services.DummyService;
import org.springframework.context.ApplicationContext;
import org.springframework.context.annotation.AnnotationConfigApplicationContext;

/**
 * @author amit@springtutorials.com
 */
public class HelloWorldSpring {

    public static void main(String[] args){
        ApplicationContext ctx =
                new AnnotationConfigApplicationContext("com.springtutorials.tutorial1");
        System.out.println(" Spring Tutorial 1: Hello World config within this class ");
        //DummyService dummyService = new DummyServiceImpl();
        DummyService dummyService = (DummyService) ctx.getBean("dummyServiceImpl");
        System.out.println(" DummyService returned: "+dummyService.test());
    }

}
AnnotationConfigApplicationContext is a fancy way of telling Spring that Spring Bean uses annotation.
@Service is an annotation on the class if you did not know.
The Spring Context needs to know where to look for Spring Beans. So, I gave it a package name (“com.springtutorials.tutorial1”).
In short, Spring will search for all classes in the folder ‘tutorial1’ for beans. It will search for sub folders within tutorial1 if it had any. There are ways to exclude and include the classes which I will discuss in details in a different post. Don’t bother with them for now.
Oh, there are many types of Spring Context that I will go over in details later as well.
Let’s look at another way to call our service.
2b) Call Spring Service using Bean interface (DummyService.java)
Get a Spring Context and ask for bean by its interface class
package com.springtutorials.tutorial1;

import com.springtutorials.tutorial1.services.DummyService;
import org.springframework.context.ApplicationContext;
import org.springframework.context.annotation.AnnotationConfigApplicationContext;

/**
 * @author amit@springtutorials.com
 */
public class HelloWorldSpringByInterface {

    public static void main(String[] args){
        ApplicationContext ctx =
                new AnnotationConfigApplicationContext("com.springtutorials.tutorial1");
        System.out.println(" Spring Tutorial 1: Hello World config by interface ");
        //DummyService dummyService = new DummyServiceImpl();
        DummyService dummyService = (DummyService) ctx.getBean(DummyService.class);
        System.out.println(" DummyService returned: "+dummyService.test());
    }

}
Not much is different between 2a and 2b. Is there? 2a was asking for service using the name. 2b is asking for service via the interface.
2c) Call Spring Service via a separate configuration file
This method will come in very handy in future. You should pay close attention.
When we delve into a web application, you will be adding more things to your configuration. Right now you have only needed to specify the package where Spring needs to find the classes.
At some point, you will need to enable transactions, enable AOP, enable MVC etc.
If you move your configurations to a separate file, you can call that file from the main application.
You can call the same file in your unit test to initialize Spring.
You can use it to call other configurations.
It is ok if you don’t see a value of this yet but I assure you this is important.
To take advantage of this:
1) Create a new file Tutorial1Config.java under a new folder called ‘config‘.
src/main/java/com/springtutorials/tutorial1/
2) The File should look like this below:
package com.springtutorials.tutorial1.config;

import org.springframework.context.annotation.ComponentScan;
import org.springframework.context.annotation.Configuration;

/**
 * @author amit@springtutorials.com
 *
 * Simplest way to initialize Spring in your application
 */
@Configuration
@ComponentScan(basePackages = {"com.springtutorials.tutorial1"})
public class Tutorial1Config {

    //nothing
}
3) Change the HelloWorld to get the Spring Context using the new file Tutorial1Config
package com.springtutorials.tutorial1;

import com.springtutorials.tutorial1.config.Tutorial1Config;
import com.springtutorials.tutorial1.services.DummyService;
import org.springframework.context.ApplicationContext;
import org.springframework.context.annotation.AnnotationConfigApplicationContext;

/**
 * @author amit@springtutorials.com
 */
public class HelloWorldSpringConfig {

    public static void main(String[] args){
        ApplicationContext ctx =
                new AnnotationConfigApplicationContext(Tutorial1Config.class);
        System.out.println(" Spring Tutorial 1: Hello World with Config in its own file. ");
        //DummyService dummyService = new DummyServiceImpl();
        DummyService dummyService = (DummyService) ctx.getBean(DummyService.class);
        System.out.println(" DummyService returned: "+dummyService.test());
    }

}
So instead of providing the package name in every class, you moved the configuration to its own file. Now you are calling the class.
You can add more spring functionalities to Tutorial1Config now. And you do not need to change the calling code anymore.
2d) Call Spring Service using Spring Boot
Remember I asked you to download a zip file from Spring Initializr.
Unzip the file anywhere on your machine.
Copy DummyService.Java (it hasn’t changed) and DummyServiceImpl (with @Service annotation). I copied them to a new folder ‘services‘ under src/main/java/com/springtutorials/tutorial1/
See snapshot below.
Hello World – Services copied into Spring Boot Zip file
Now change the Tutorial1Application.java file that came bundled as follows.
package com.tutorials.spring.tutorial1;

import com.tutorials.spring.tutorial1.services.DummyService;
import org.springframework.boot.SpringApplication;
import org.springframework.boot.autoconfigure.SpringBootApplication;
import org.springframework.context.ConfigurableApplicationContext;

@SpringBootApplication
public class Tutorial1Application {

   public static void main(String[] args) {
        ConfigurableApplicationContext context = SpringApplication.run(Tutorial1Application.class, args);
        System.out.println(" Spring Tutorial 1: Hello World with Spring Boot. ");
        //DummyService dummyService = new DummyServiceImpl();
        DummyService dummyService = (DummyService) context.getBean(DummyService.class);
        System.out.println(" DummyService returned: "+dummyService.test());
   }
}
The small change is to get a handle on the Sprint Context from SpringApplication.run. Once the Spring Context is there, calling the bean is same as in above examples.
Remember Spring Boot gives you a lot of things pre-built. @SpringBootApplication did that magic for you. In this example, it prepared the Spring Context for you without you telling it where to look for beans.
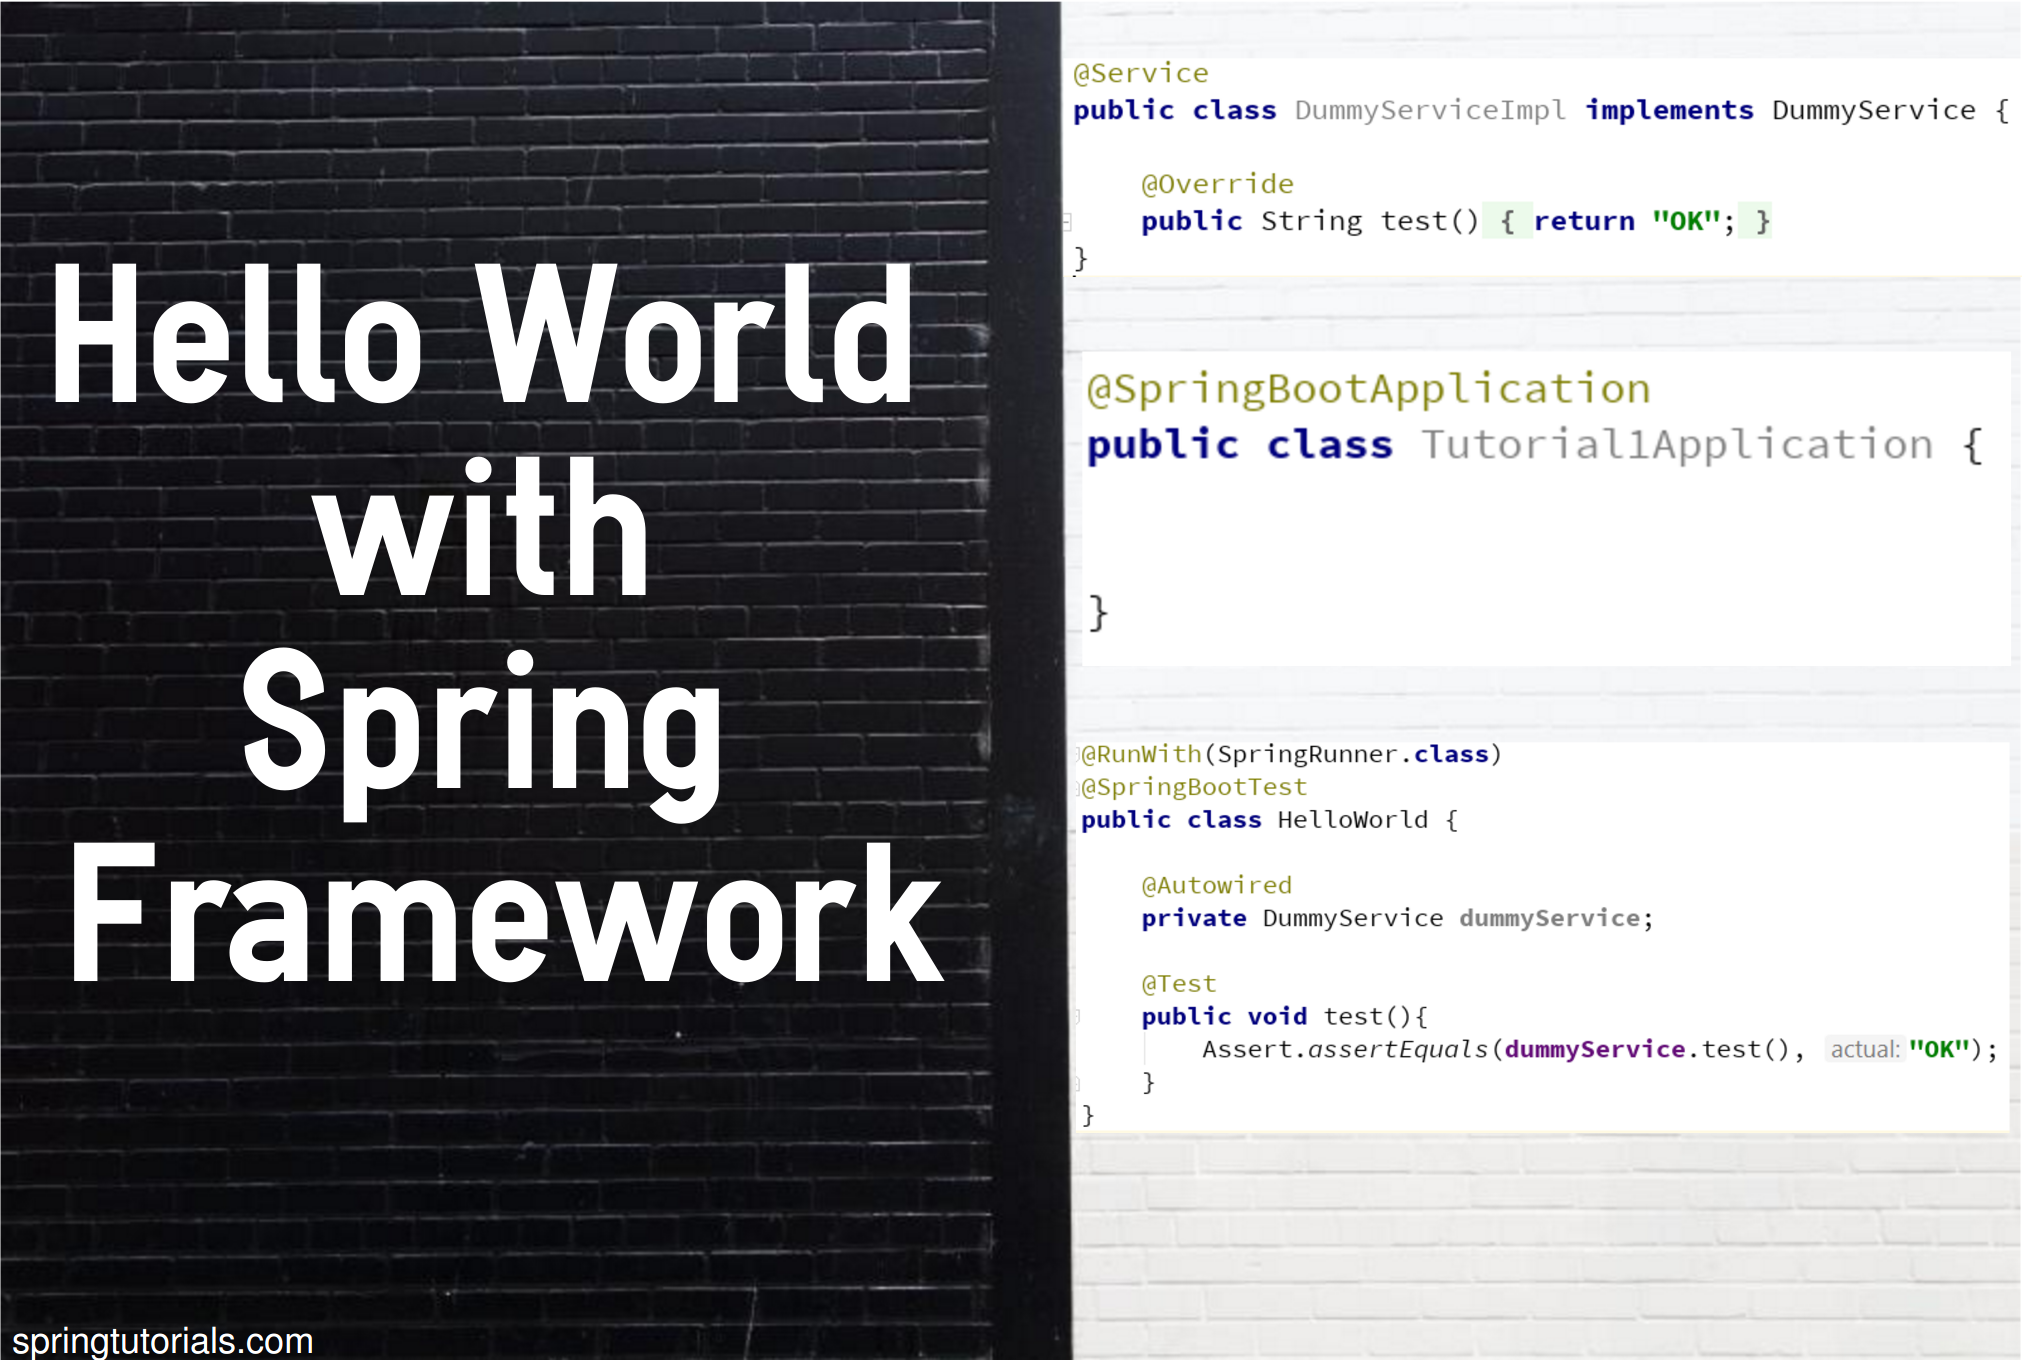
Spring Boot also provided a built-in test suite ready to run. Look for ‘spring-boot-starter-test‘ artifact in your pom.xml and you have a JUnit brought in for you.
Don’t forget that your application is not going to be standalone in most cases. If you are like me, you are doing web applications most of the time.
You want to learn how to auto wire your service and apply it to your Spring controller or other places. Don’t worry, I will explain controllers and services again in future.
The code below shows how to invoke the services in your unit tests. It shows you how to use @Autowired. You don’t want to call Spring Context in every class to get the bean. @Autowired takes that away from you.
Did you notice that none of the Spring based HelloWorld import DummyServiceImpl now?
Here is what is going on.
Instead of you calling the Service yourself, you are now asking Spring for it. It is Spring’s job to bring that service and make that available to the caller asking for Service. The caller is the main method or the unit test in examples above.
Spring makes that service available by injecting it for you without you having to call it. This is Dependency Injection.
The fact that Spring controls when to inject the service and not youis called ‘inversion of control‘.
What is not obvious from this exercise is – your service can be remote or local and your calling code won’t change.
This makes testing a first class citizen of your code.
I switch databases based on the environment in almost all projects and Spring lets me do that easily.
Spring can inject dependencies based on the environment as well via Spring Profiles. We will study that later.
I will stop here today. This is a lot to take in and I appreciate your staying with me in all this time.
Hello World with Spring Framework using Spring Boot
Here is what we learned today:
We learned how Spring solved some common enterprise issues we faced in the past.
We took a java class and added Spring to it to show a simple hello world example.
We learned that Spring packs a lot of functionality in its offering. We have only scratched the surface here. We saw a glimpse of it in Spring Boot but there is a lot more functionality that is available there.
We downloaded a project template with all dependencies and sample code to get us started.
We also learned how to download it plain vanilla.
Spring is flexible and allows us to work with it in many ways.
Spring makes testing our code easier.
We learned that Spring supports ant, maven, gradle or simple java application.
Is there anything I assumed that I should have explained but did not?
Was there anything that I can make simple?
Please let me know and I am happy to go over it.
If you enjoyed this post, it would help me a great deal if you shared it. I thank you in advance!
I uploaded the GIF above as a youtube video here. My first effort at uploading a video 🙂
I work as an independent consultant in and around DC metro area. My clients have included federal agencies, non-profit firms and semi-government organizations. I live in Sterling, Virginia with my wife and our two kids.